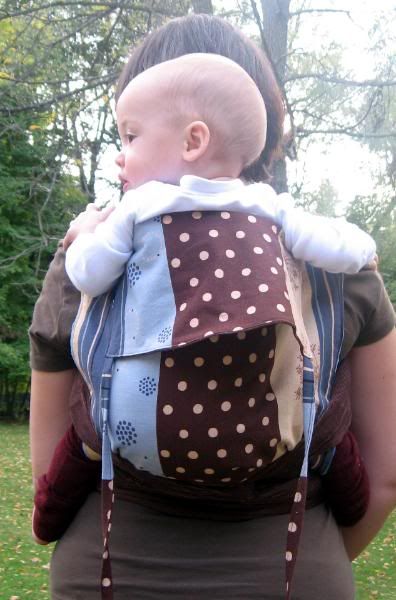
 Ahhh, the elusive Scandi Mei Tai. They are currently all the rage with MT lovers. Featuring beautiful fabrics and sturdy, strong construction, many devotees claim that Scandis make their heavy baby or toddler feel almost
"weightless." There are equally as many tales of their magical sleeping properties - wear your baby in one and they'll instantly reward you with a nice, long snooze. Mmmm, Sounds like the perfect baby carrier, doesn't it?
Okay, first step. Assemble your materials.
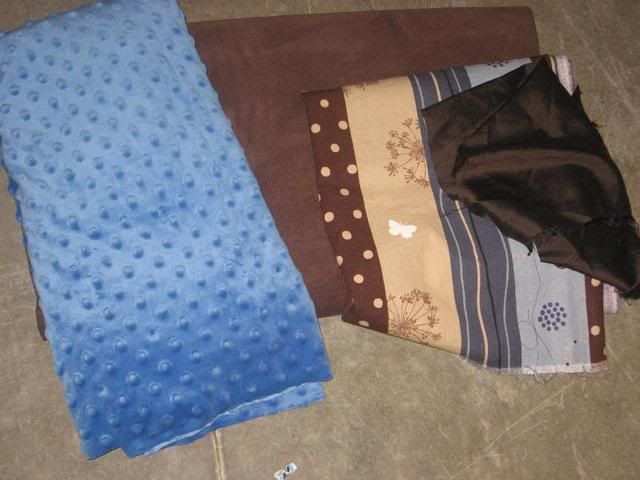 2.5 yards of strap fabric. In this case, 14-wale chocolate corduroy. When choosing your strap fabric - it is important to select a bottom-weight fabric like canvas, denim or twill with a minimum weight of 7 oz. Actually, 10 oz. is better. Baby cord is not strong enough for a baby carrier. NOTE: There has been a lot of recent discussion about the suitability of corduroy for mei tai straps. Cord is a compromised fabric because the pile inside the wales has been cut, thus weakening it. If you do intend to use cord for your mei tai, I can not stress enough how important it is to make sure that the cord is strong. Hold it up to the light before sewing with it. If you can see light through the fabric, it probably isn't strong enough. Cord carriers have ripped in several instances because the fabric used was not strong enough to support the weight of a baby. Please exercise utmost caution when using cord. For what it's worth, I now only make mei tais with heavy canvas (8-10 oz) or twill. In addition to being safer choices, sturdy, strong fabrics also offer the most support and comfort.
 5/8 yard designer fabric. I'm using Echino Cocoa Butterfly.
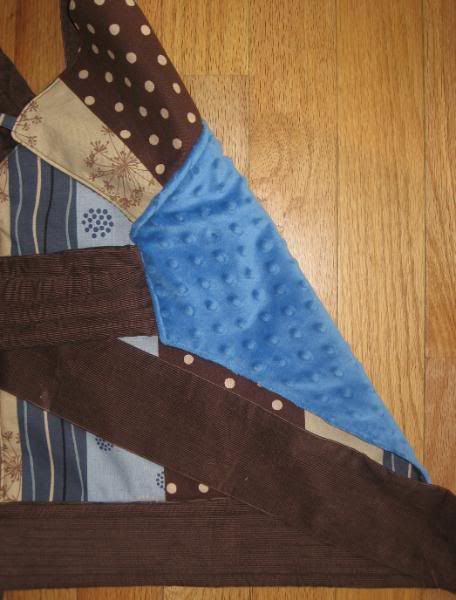
5/8 yard lining fabric. Blue Minky here.
Note - I decided not to use the dupioni silk pictured here.
You'll also need an 18" square of heavy canvas, some fleece or cotton batting for padding the waist and shoulder straps and coordinating high-quality thread like Gutermann. Make sure you wash and press all of your fabric before beginning.
Step One: Make the straps
My finished straps will be 4" wide by 84" long, so measure 9" across the short end of your cord, snip the end of the fabric, and RIP all the way to the end.
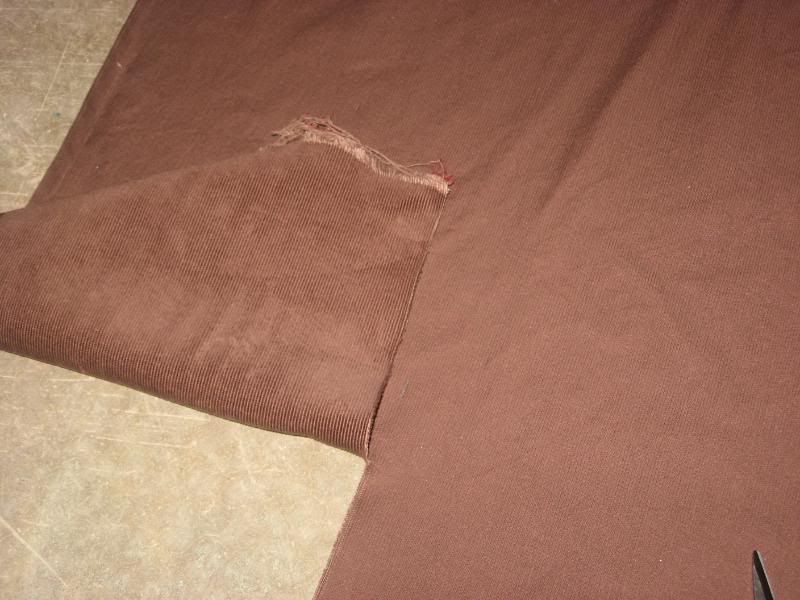 Cord rips reaaallly well along the wales! It's so satisfying to rip, rip, rip all the way to the end. This will give you a 1/2" seam allowance. Note: these are really long straps. You might want to make them up to 10" shorter. I like to tie Tibetan in a back carry, so I make them longer for me. If you decide to make the shoulder straps shorter, make sure you keep the waist strap around 80-84".
Next, sew the shoulder straps. Trim the straps on one end to the desired length. I make mine 88" long so I have 84" finished straps.
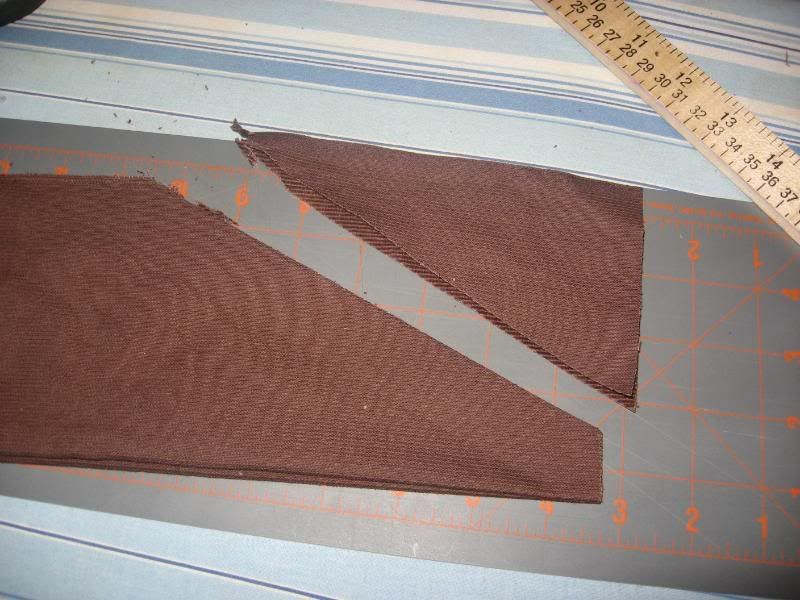 If you desire, cut the straps at an angle on one end if you prefer a taper. I use about a 45 degree angle.
 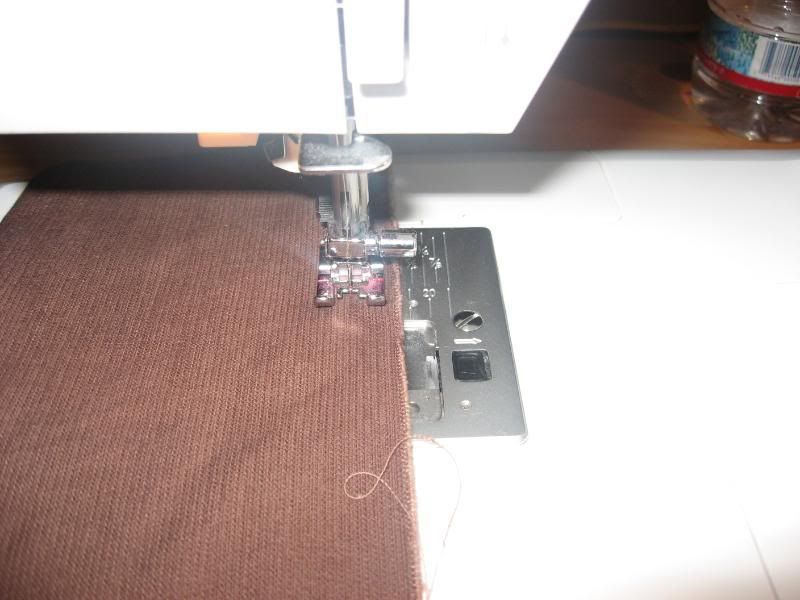 Then, right sides together, stitch the straps from the point of the taper to the end. Turn. Press.
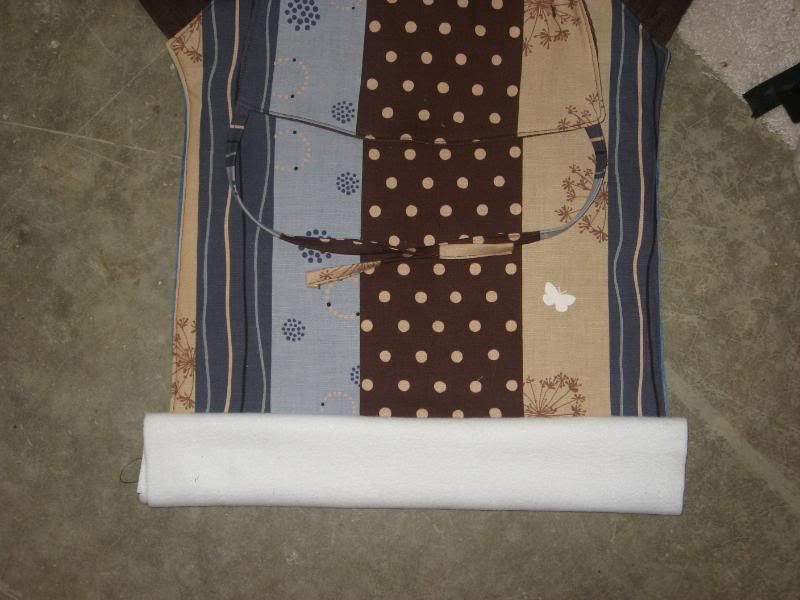
  For the padding - I use a layer of polar fleece - cut 12"x20"
 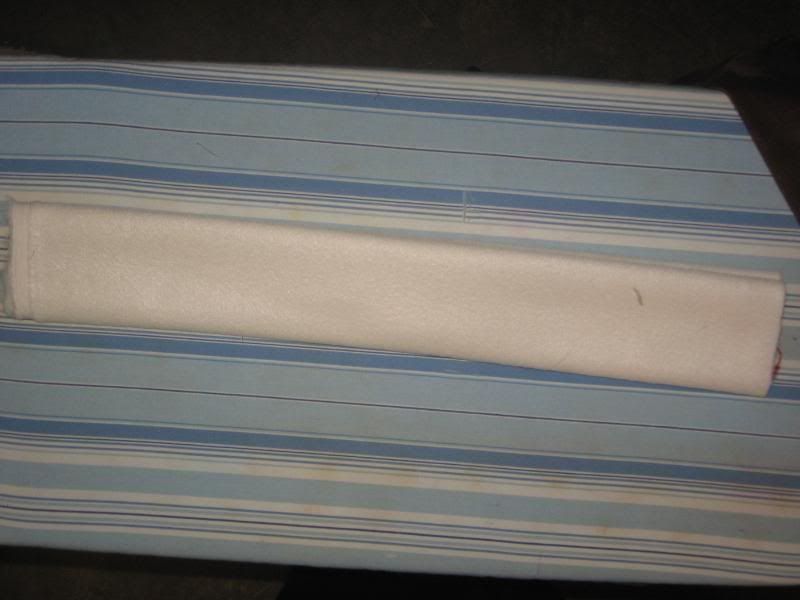 Then, fold the long ends to meet in the center and then fold that in half (so raw ends are tucked inside).
 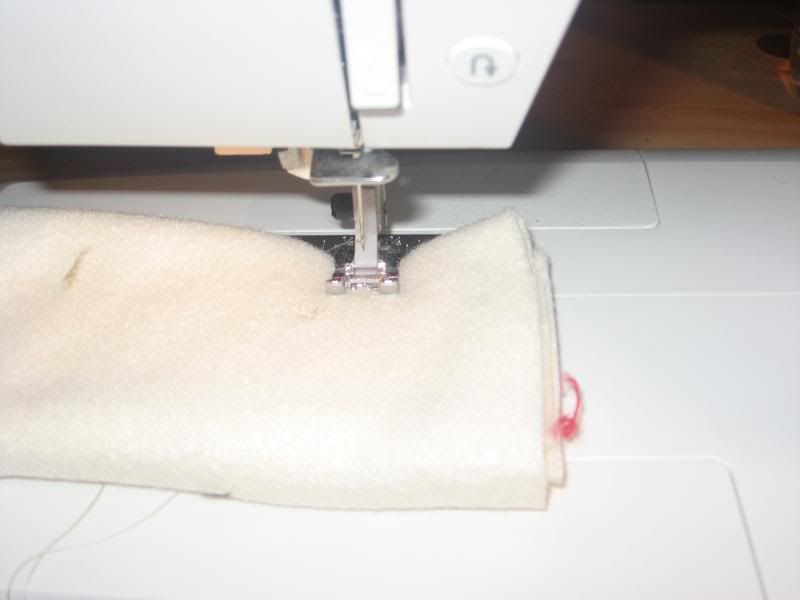 I always make a little tack stitch on the ends and the center so it stays together while I'm stuffing it into the straps.
Fold the top 8-10 inches of the strap down like you're turning down the cuff of socks. Stuff one end of the batting inside and pull the strap material up over the batting. Use kitchen tongs or a yardstick to help in keeping it flat and even. Stuff it far enough inside so that you have at least four inches of strap material left at the top.
 Stitch three equally-spaced lines down the length of the padding in the straps.
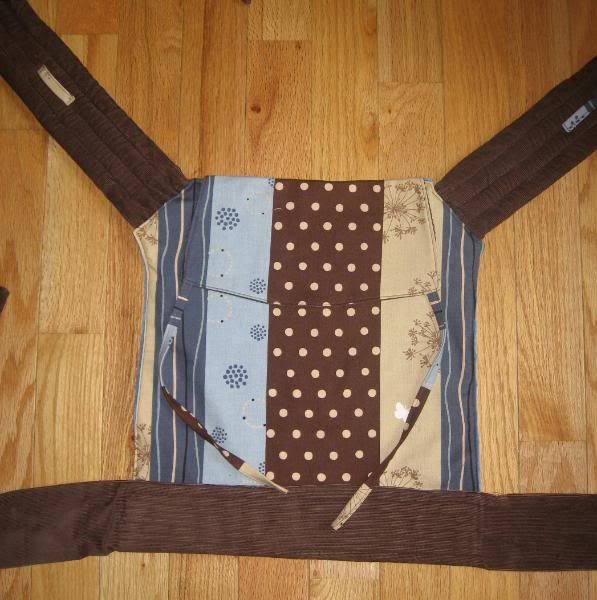
 Two: Cut out body panels and attach straps
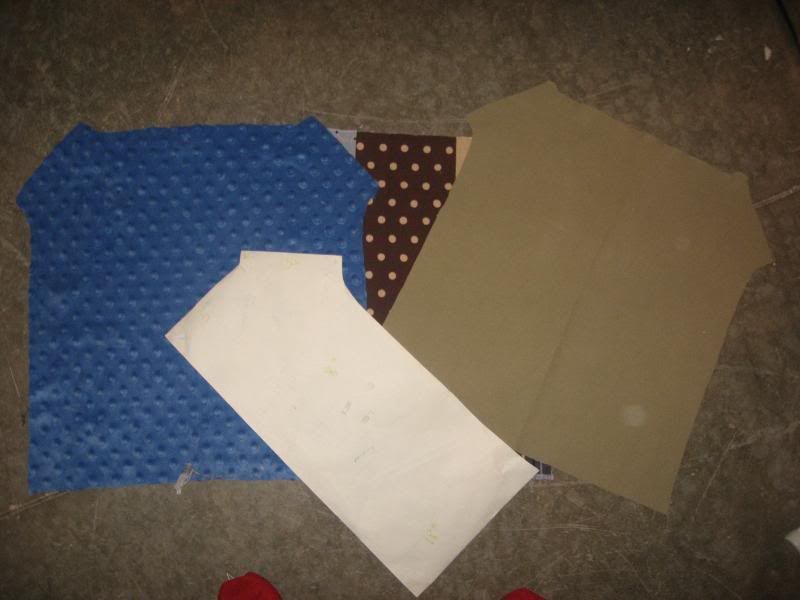 You'll need one layer of your decorator fabric, one layer for the inside or reverse (minky, silk, cord, or another decorator fabric if you want it to be reversible to that), and one layer of heavy canvas for the inside.
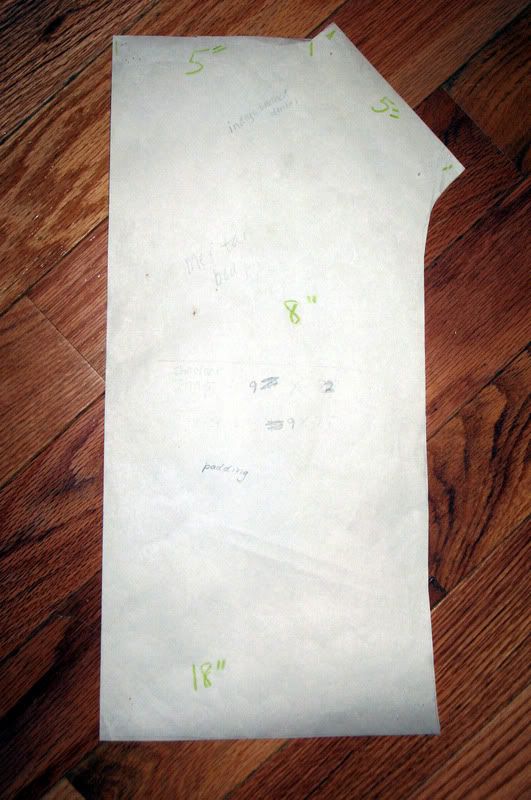
 Here is a pic of my pattern Cut on the FOLD.The body is 8" wide at the middle, 18" tall. The flat part at the top is 5" and the part where the shoulder straps attach is also 5". You may choose to make your pattern a few inches taller if you have an older baby. This pattern will yield a MT approximately 17"-17.5" tall.
 Working with the canvas layer, attach the straps to the corners with x-boxes. First. fold down 3/8" of the body panel where the shoulders attach and press.
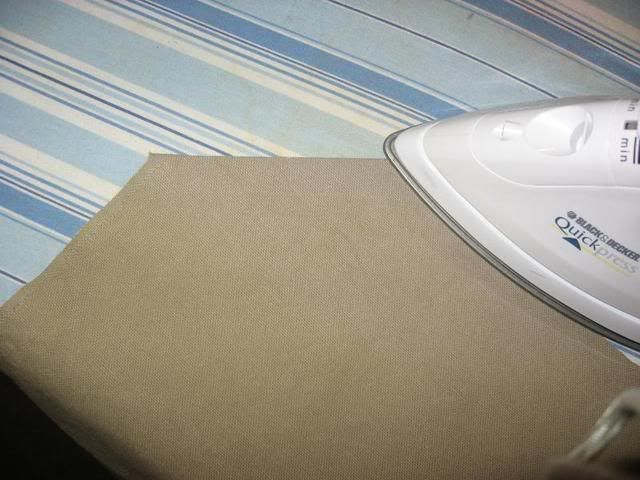
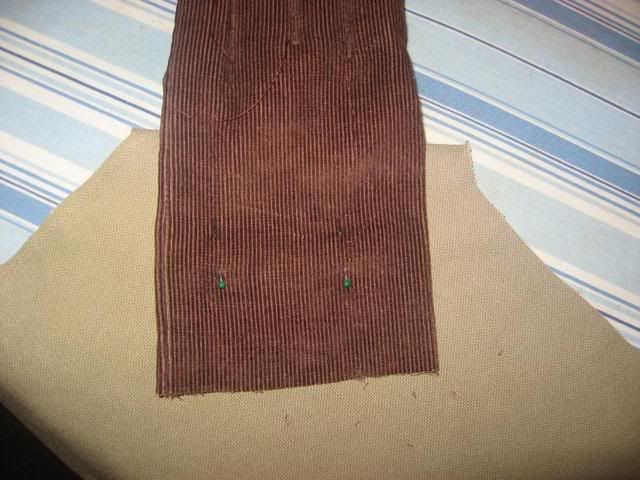 Then, pin the straps centered on the body.
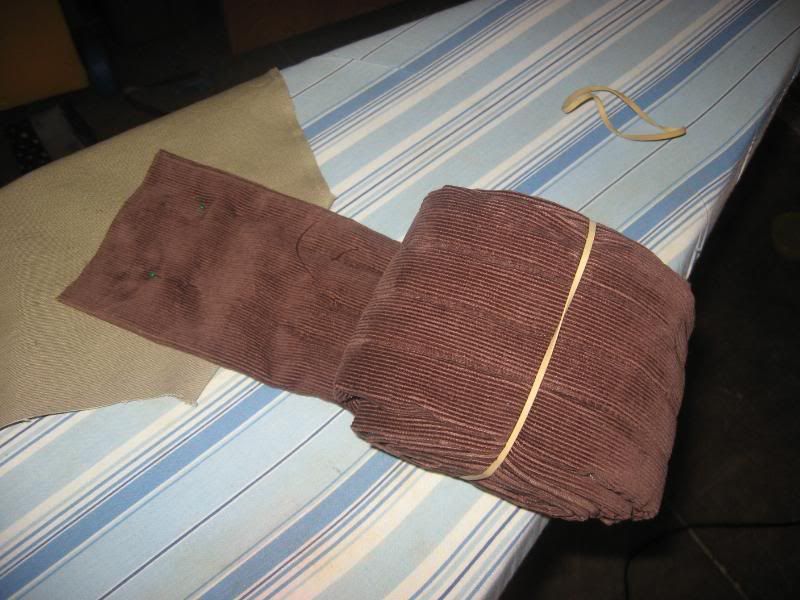 Tip: roll up the straps and secure with a rubber band to keep things neat while you're stitching.
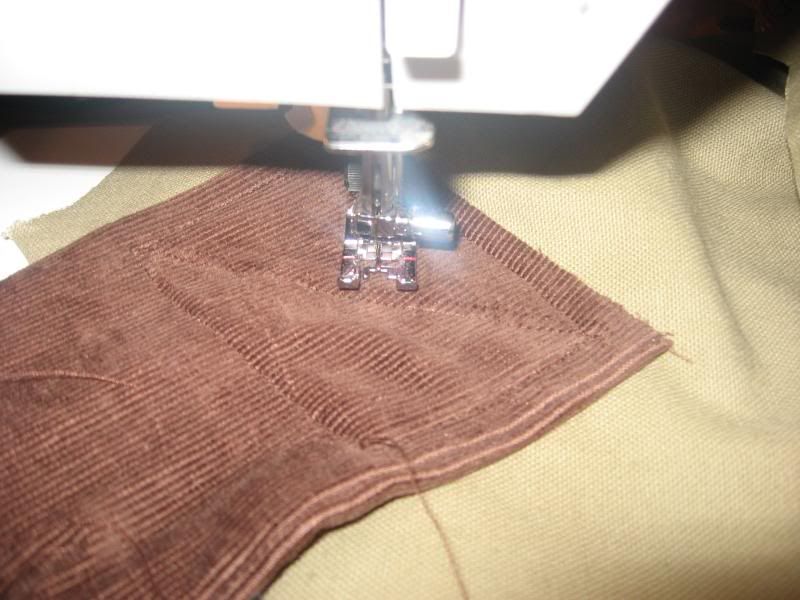 Stitch around the straps with a square and an X in the center. I usually start at a long end and work my way around, reverse-stitching on the short ends to get to the corner before I start my diagonal stitch for the "X." Just neater that way and I don't have to cut the thread and start over again.
Step Three: Baste Reverse to Canvas
After your X-boxes are sewn, 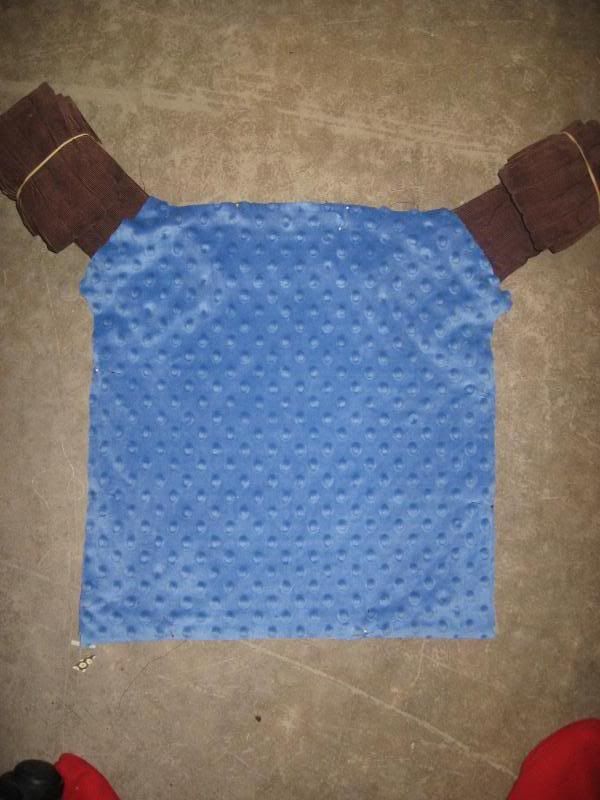 pin the reverse side facing UP to the canvas layer (with the straps and X-boxes facing UP).
 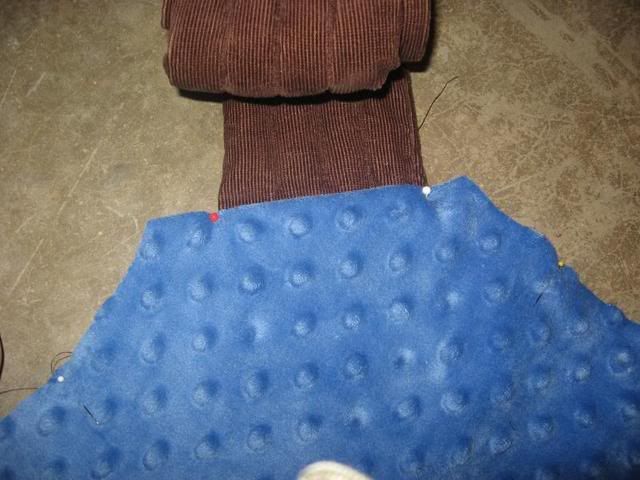 Also, fold down 3/8" of the reverse layer where the shoulder straps attach and pin. Machine-baste the reverse layer to the canvas layer with a 1/4" stitch SKIPPING OVER the part where the shoulder straps are attached that you folded and pinned.
 Cut out one layer of designer fabric and one layer of cord for the hood. For my pattern (on the FOLD),
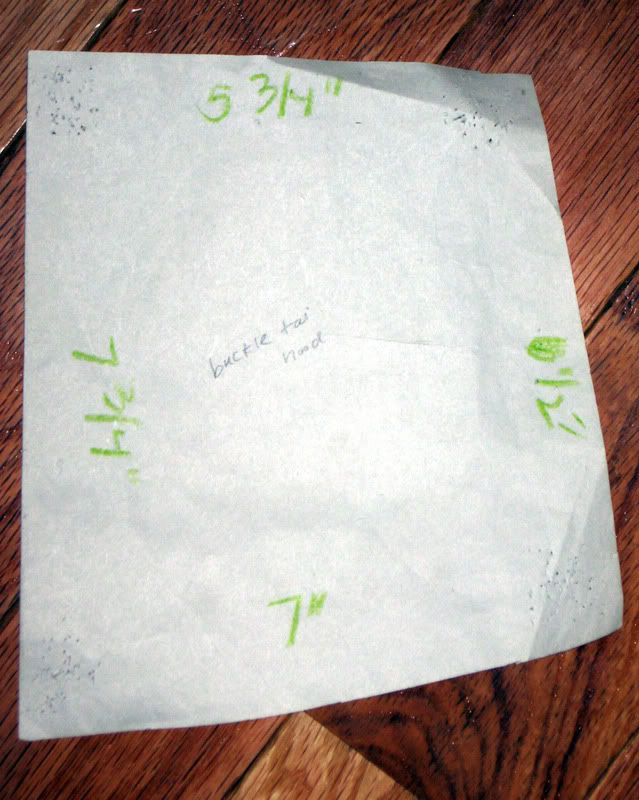
The hood is 5.75" at the top, 6.5" on the outside, 7.75" on the inside and 7" at the bottom. You may want to match up the hood to the body, depending on the design.
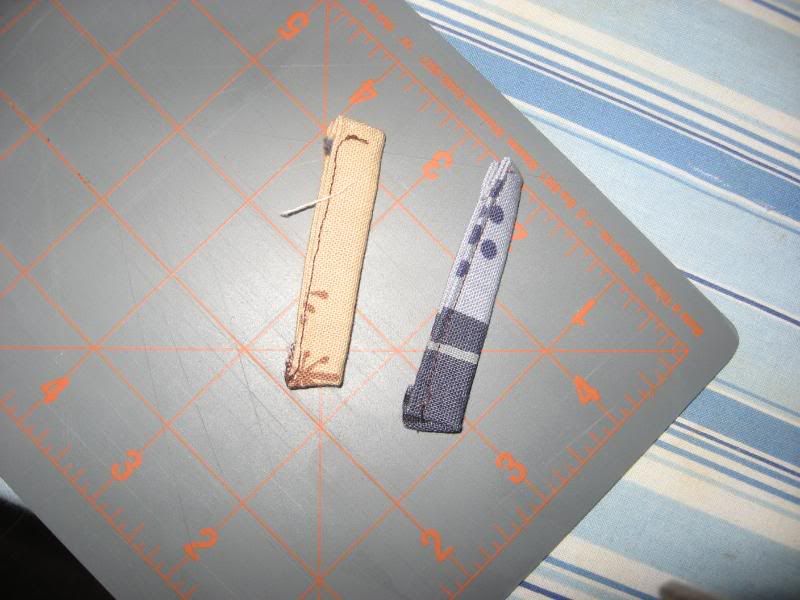
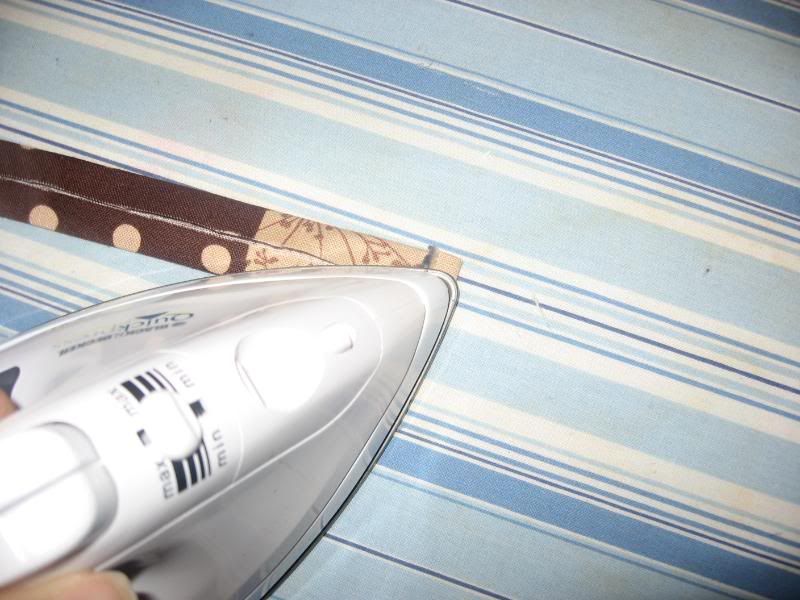 Also, cut two strips for the hood straps - 2" by 14" out of either silk or the decorator fabric. To make the straps, just fold the long ends to the center to meet, press, fold the raw ends of one edge under, press,
  then fold in half, press, pin and topstitch to close.
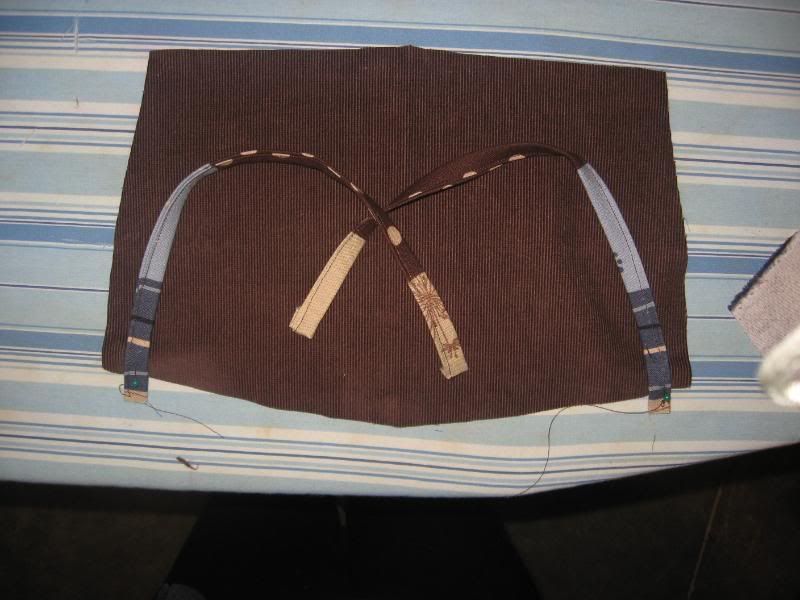 With the right side of the reverse of the hood facing up, pin the straps at the bottom corners with about 1/2-inch of the raw ends sticking out. Tucking the hood straps to the inside, pin the hood right sides together.
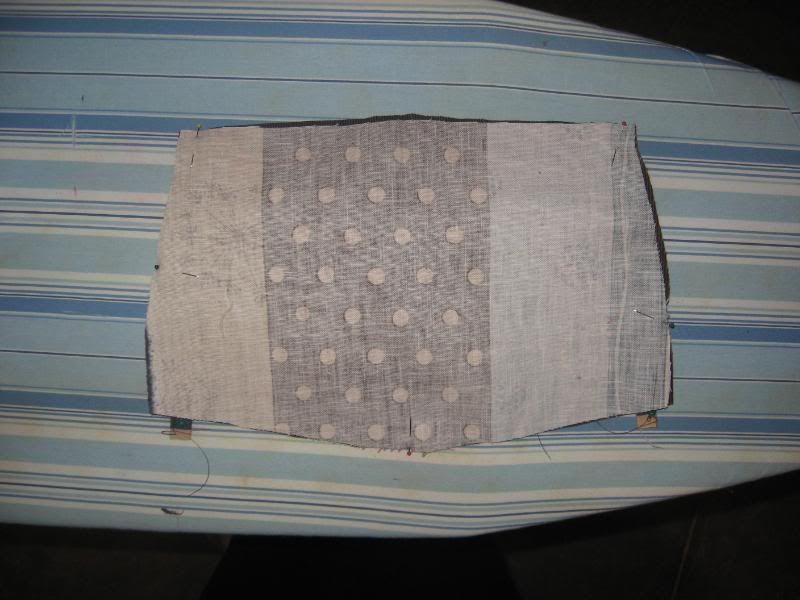 Stitch with a 1/4" seam allowance, leaving a small hole for turning at the top.
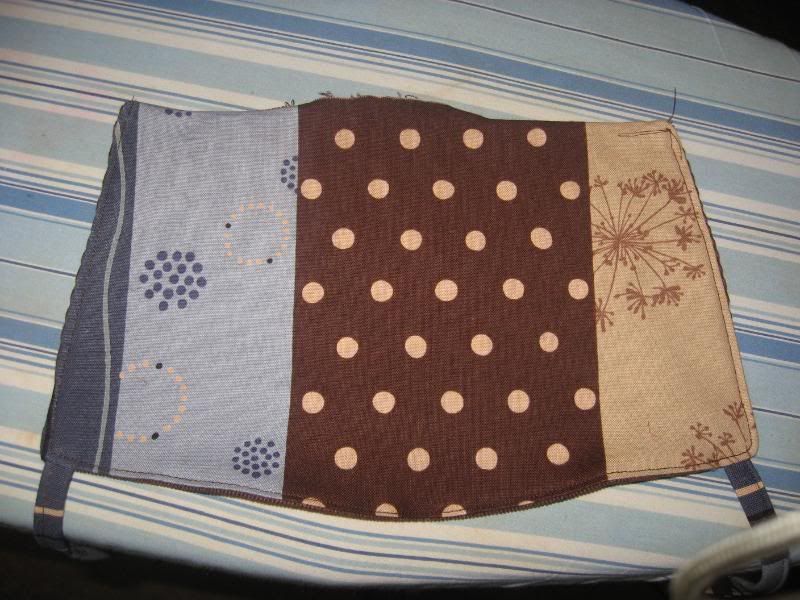 Turn, press, topstitch. You don't have to worry about closing the hole because it will be hidden.
Step Five: Stitch Front to Back and Sandwich Hood
Now, pin the hood right side down onto the reverse side of the MT at the top, centered on the body between the straps. Pin the decorator fabric, facing down on top of the reverse.
 If your hood needs to be lined up with your front panel, pin the two pieces together, lining up the pattern and then pin both
  pieces facing down on top of the reverse.
 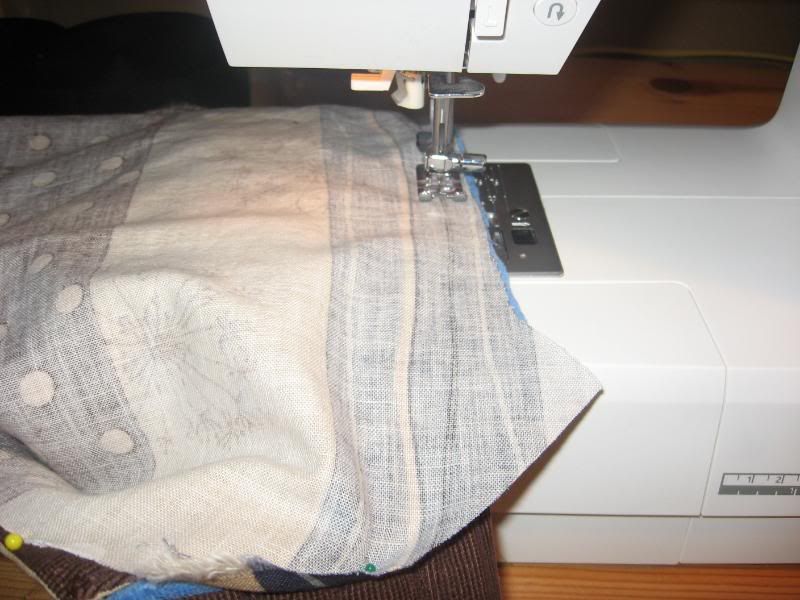 Stitch with a 1/2" seam allowance SKIPPING OVER the part where the shoulder straps are attached that you folded and pinned. Don't worry about stitching the bottom closed. This will be sandwiched in the waist strap anyway. Turn inside out, press.
 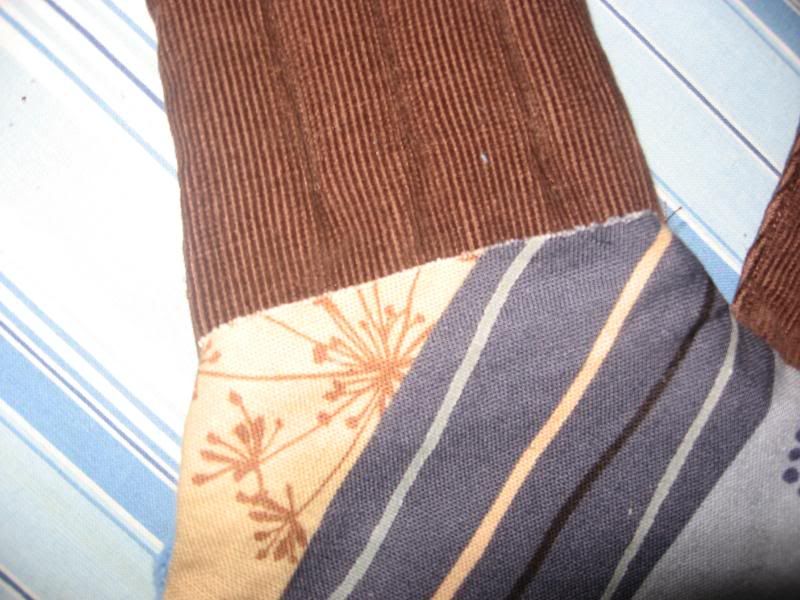 Now, where you've folded under the canvas and reverse fabrics, you'll see you now have neat layers.
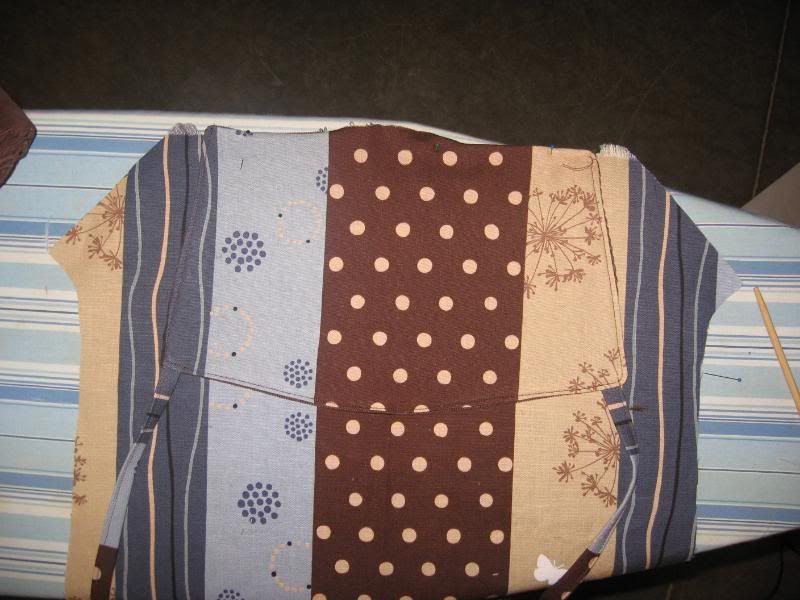
 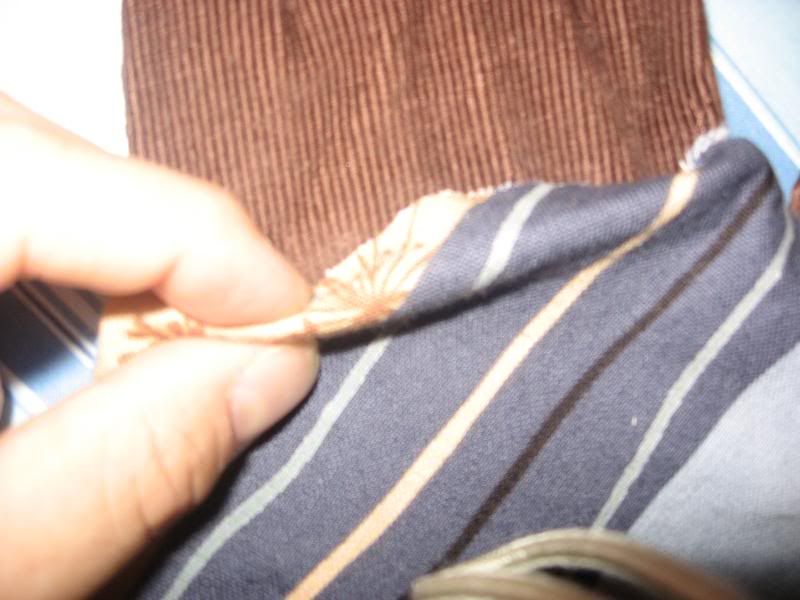 Fold the decorator fabric under and
 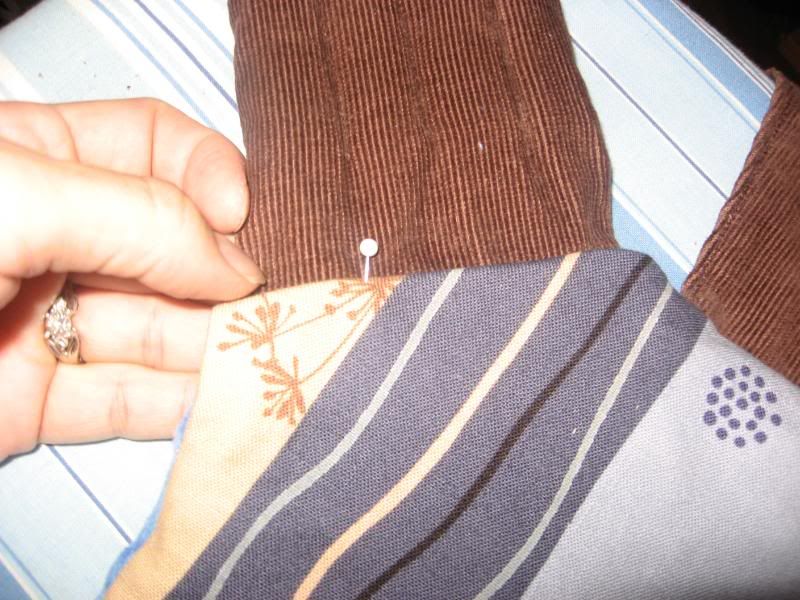 pin through the straps and layers.
 Topstitch around the entire carrier, except the bottom, very close to the edge. This will close the holes and give the carrier a nice, finished look.
Step Six: Make and Attach Waist Strap
Take the last strap, cut a taper on both ends if desired, stitch right sides together, leaving an 18" hole in the center. Turn, press.
 Measure a 12"x17" piece of polar fleece, fold it like you did for the shoulder straps, insert the bottom few inches of the body of the carrier inside the padding and then sandwich inside the hole in the waist strap, turning the raw ends under.
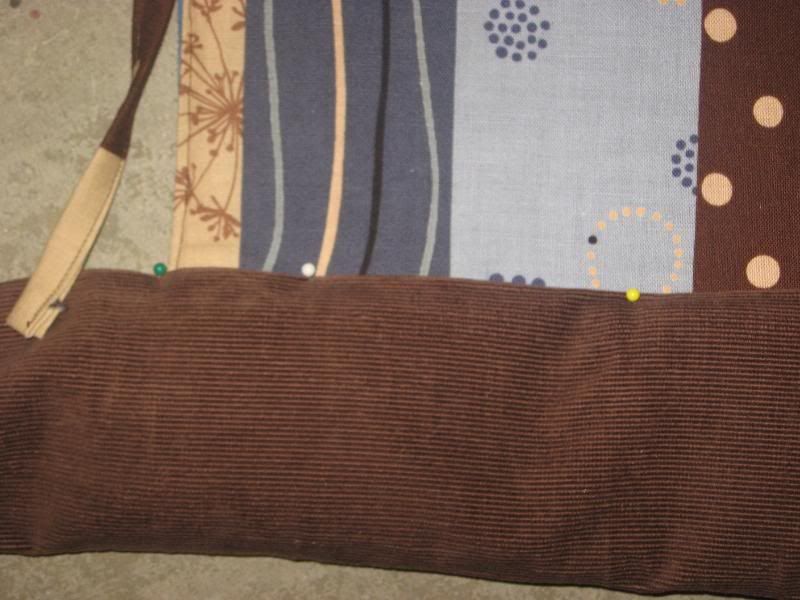 Pin through the straps, body and padding, making sure to catch the bottom strap.
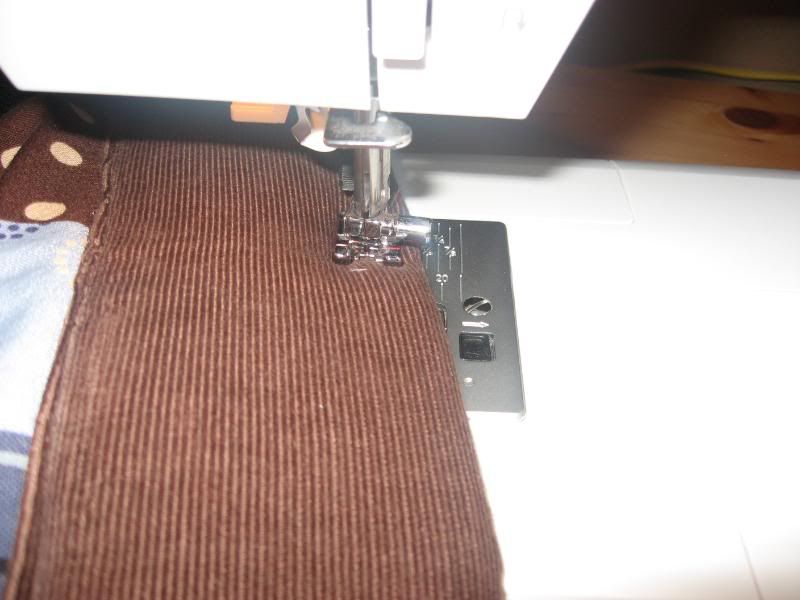 Top stitch to close the opening and then stitch horizontal lines every 1/2-inch through the padding for security and comfort.
Step Seven: Make and Attach Hood Loops
 Make some little hood loops for the straps - cut some pieces of silk or decorator fabric 2"x3", fold like the hood straps, topstitch, turn raw ends under and stitch to the shoulder straps so that they can be easily accessed in either a front or back carry. I pin the bottom of the hood loop 7" from the shoulder strap.
Voila! Or, as they say in Norway, Værsågod!
57 comments:
Thank you so much for finding a way to continue sharing the love with us poor, home-sewing folks!
Thank yous in profusion shall be showered down upon you :D
I really appreciate your efforts to keep it open to us DIYers and wanna be DIYers :)
Merci beaucoup! Thank you vey much!
Thank you!
Thank you:)
Thank you so much! I'm going to pick out fabric this weekend to make one for my soon to be here baby! It's a great looking mei tai!
Thank you for still making these instructions available. I started on it last night and so far so good. I still have a ways to go, but I'm enjoying myself and can't wait to get it done!
Oh, what a relief! I had seen your tutorial when you first posted it and had good intentions to make one for myself. Fast forward to now (third son is 18 mo. already!) and I finally get around to thinking about sewing one. I almost choked when I saw you had to remove it. Thank you SO MUCH for reposting!!! I plan to purchase my fabrics this weekend and get to sewing- no more lugging this 32 lb kid around on my hip! Bless you!
Thank you, I hope to try this tutorial sometime soon. I read about your troubles with this and I just want to thank you and say that I wish you the best!
I finished my Scandi Mei Tai and I love it and so does my 8-month old son. I have yet to try my 21-month old in it :) I am a 1st time sewer and your instructions were so clear. This was my 1st project, and I think it came out good for a 1st time sewer! Thank you again for making the instructions available.
Thank you for re-posting this. I'm so excited, I'm making it for a friend for her baby shower. The hood is great, I need to make one for myself since my son's head always lolls about when he sleeps.
Thank you!
Thank you thank you!! I have been searching for a easy to understand well constructed met tai tutorial for months now. I really really appreciate your time and effor in putting this together!!
You have no idea what a blessing you are.
I am looking forward to making a stash for my new baby, including a buckle tei :)
I feel like I owe you!
Wow!
Was directed to this from a mum's forum. What a fantastic set of instructions. Can't wait to choose some fabric & make one for DD. Thank you :)
what a great tutorial! your carrier only took me about 6 hours total to make ( i have 3 kids so it was spread out of 4 days lol) the instructions are great most of it i would recal from memory when i had just a second to sew inbetween needs. My youngest (9 months) absolutely loves it she spent about 4 hours in it yeaserday without a complaint! thank you so much for providing this beautiful carrier pattern we all love it!
I made one of these mei tai's when you had the instructions posted on the old blog, and I have to say that it is still my favorite mei tai, after trying out a few others. Very comfy, and just the right size.
Thank you for the wonderful tutorial! I am absolutely horrible at machine sewing, and yet I managed to make this in a day (just finished it) and I love, love, love it! Thank you! (Mine is at http://www.littlesisterhandmade.com/2009/02/my-new-mei-tai/)
This looks amazing, I hope I can find the time to make it :)
I can't see any of the pictures - and would love to use your tutorial to make this. Do you know how I can see the pictures to help me out? Thanks!
Thank you so much for the great step-by-step. I have just finished mine and am very pleased with the result. I referred to your instructions all along the way, which were clear and easy to follow.
Thanks again!
It took me about 5 hours to make mine (I'm a middling seamstress who works slowly while learning). I found twill on sale, cut up a rarely used blanket for the Minky and couldn't pass on some kingly batik print for the baby boy. It's fabulous! So comfortable and will rescue me from my sling backache. Thank you for sharing. Pics here: http://w4wilhelmina.blogspot.com/
Thanks so much! I made one for me and my little girl, six months old, and we love it! We go everywhere with it. Now I am making one as a present for her godmother who is pregnant with her first baby. What a wonderful gift to be able to give - thanks to your gift of putting these clear and workable instructions on line. Thanks again! Ziggy
Some changes I made:
1 - I used 14, not 12 inches of fleece for the padding
2 - I made a button-on hood
3 - The one I am making now, I am making the hood over twice as big in order for it to act as a sunshade as well as something for her head to rest against.
4 - I am also adding some little straps sewn on to the main straps that you can tie across your chest above your breasts, so working a bit like the tibetan way of tying, but without the extra strap length.
Good luck to all - Ziggy
Beautiful :) I have a baby shower coming up and this is a perfect gift! I will make sure and tag back from my blog to yours when I'm done!
thanks for this tutorial, It is really clear and there were no problems to sew the MT. I finished ma first MT yesterday, my son doesn´t want to be in it, he´s two years old in a month so he prefers run on his own, but I believe that another child will like it :)
some photos are here http://cocci-coccinelle.blogspot.com/
Thank you. I've never touched a mei tai before, but I followed your directions and made myself a lovely one. I find it very comfortable. My five month old daughter likes it and my husband thinks it's the nicest carrier we have. I'm going to make one for him next. Thank you for making your instructions public.
can you tell me how to use one? I have one, but don't know how to tie it.
Really a great tutorial...thanks for sharing!!!
Barbara, Italy
I love this tutorial! I have now made two!
http://nicollesoriginals.blogspot.com/2009/11/scandi-mei-tai-take-2-reversible-cowboy.html
and
http://nicollesoriginals.blogspot.com/2009/09/scandi-mei-tai.html
Thank you!!
\I'm really confused about how to attach the hood and finish off the body??? If anyone is still around please help. Mine started looking awful!
This is AWESOME!! I love the hood!
http://dreawood.com/?p=4014 - Posted photos of the scandi i made using your tutorial. I made this years ago using it! :) and just had another baby 3 months ago, so i get to use it again! love it.
I can't find an email address!! I want to request permission to translate your post to Spanish for my babywearing blog.... please contact me if possible!
This is the second mei tai that I've made and I love it! The padded straps and waist are so comfortable. It fits my chunky 7 month old very well and I'm hoping it helps me deal with his clingy I-want-Mommy-24-7 phase.
This is full gooooooooooood. :) I Won a very pleased with the media. and skillful work to understand and follow the pictures. congratulations. !!
This is a great tutorial and I have a question. Since its obvious that you have made many of these, what kind of fabric do you recommend for summer wearing?
Thanks!
Thank you so much! Made this today and your instructions were fantastic! Every other time I've tried to follow a pattern or free hand a mei-tai, I've gotten so frustrated! Your tutorial made it fun! Thanks again for sharing!
The Ring Sling is probably the most popular Baby Carrier for nursing, as it is very adjustable and the tail can be used for privacy. Most women find it easiest to nurse with the baby's head away from the rings. You can also nurse in the football position this way.
Just found your tutorial through Pinterest - thank you so much! I only have time to look quickly just now, but I'll be coming back to it in the next little bit (I have a newbie due in December and want to try making a carrier rather than using a long length of fabric for wrapping this time).
Thank you so much for sharing this! (Just found it on Pintrest.) Do you think a dupioni silk would be strong enough for straps?
This is such a great and easy to understand tutorial - thanks. I just finished making my first Mai Tai and I love it.
I have shared it on my Pinterest board (http://pinterest.com/eddieduckling/creating-for-baby/) - I hope that's OK?
take care,
Eddie
Thankyou, a great tutorial. I finally made one and although I changed it quite a bit, your tutorial was an excellent guide for me to follow and I would have been completely lost without it. Thankyou :) I posted about mine here http://asunnyhome.blogspot.com/2011/12/mei-tai-baby-carrier.html
Absolutely love this! It was an easy one to make, and I had a lot of fun doing it. My little one loves it so much, he fell asleep in 10 min of wearing him.
Baby carriers are used around the world and are called by many names depending on the culture and the country where it is used.
I'm struggling to draw the hood template. I can't seem to get it right, can anyone help?
I made it myself and my baby is happy about it! http://creamaggy.blogspot.be/2015/04/draagzak-voor-de-jongste.html! Thank you for sharing!
Is this still an active blog? I'd love to use this tutorial, but I can't see any of the photos. All the photos are boxes that say "update your photobucket account." Is that something the blogger needs to update, or myself?
Many thanks for sharing!
https://www.linkedin.com/pulse/thuoc-cuong-duong-nam-gioi-tot-nhat-hien-nay-suckhoetinhyeu-info/
This way my associate Wesley Virgin's story starts with this SHOCKING AND CONTROVERSIAL VIDEO.
Wesley was in the military-and shortly after leaving-he revealed hidden, "self mind control" secrets that the government and others used to obtain anything they want.
These are the exact same tactics many celebrities (especially those who "come out of nothing") and the greatest business people used to become rich and famous.
You probably know how you only use 10% of your brain.
Really, that's because the majority of your brainpower is UNTAPPED.
Perhaps that conversation has even taken place IN YOUR own head... as it did in my good friend Wesley Virgin's head 7 years ago, while riding a non-registered, garbage bucket of a car with a suspended driver's license and $3.20 on his banking card.
"I'm very frustrated with going through life paycheck to paycheck! When will I get my big break?"
You've taken part in those types of conversations, am I right?
Your very own success story is waiting to be written. Go and take a leap of faith in YOURSELF.
WATCH WESLEY SPEAK NOW
Nice Aricle
Come and win with us
SahabatQQ
Agen Domino99
Good information here. I really enjoy reading them every day. I've learned a lot from them.Private tutor Lighthouse Thanks so much for sharing this information. Greatly help me being a newbie.
Very good stuff with good ideas and concepts, lots of great information and inspiration, both of which we all need, Jupiter Island Tutoring helpful information.
Thank you for the work you have put into your nice blog. Aventura Tutoring We will bookmark to your blog because it is very informational. We love the site and will come back to see your new posts.
A mind blowing article is provided here. Private tutor Westport And it is written with great skill and the words directly explain the thought of author.
A mind blowing article is provided here. Private tutor Greenwich And it is written with great skill and the words directly explain the thought of author.
Good information here. I really enjoy reading them every day. I've learned a lot from them.Private tutor Wellesley Thanks so much for sharing this information. Greatly help me being a newbie.
This is very nice blog because information provided here through the article and the pictures are very effective. Private tutor Sag Harbor Because sometimes words cannot explain the things that pictures can and here the words and pictures both are expressing the things in balance.
Situs Slot Online Terpercaya 2021
RUMAHBOLA88 : Situs Judi Online, Slot Online, Sbobet Online Terpercaya
📌LINK DAFTAR : Rumah Bola88
Terima Daftar & Deposit dari Berbagai Bank & E-Wallet :
⚠️BCA, MANDIRI, BNI, BRI, DANAMON, CIMB NIAGA, BPD
⚠️DANA, OVO, GOPAY & LINKAJA
*SEMUA BANK ONLINE24JAM*
------------------------------------------------------------------------------
💸Minimal Deposit - Rp 10.000
💸Minimal Deposit via Pulsa Telkomsel - Rp 15.000
💸Minimal Withdraw - Rp 25.000
Post a Comment